| by John Beale (beale@best.com) v8.7 July 29 2004 |
Original location: http://www.bealecorner.com/trv900/dvfaq.html
|
[09/03/01] Here are some questions and answers regarding the Sony DCR-TRV900 three-CCD-chip, MiniDV-format digital video camera. I bought one of these cameras soon after it came out. I don't own stock in Sony. The usual disclaimers apply... my opinions are my own. Note: I'm assuming you've read the information on Sony's web page about this camera. This FAQ is intended to complement the official stuff. Feel free to send me questions and/or answers you'd like included in this FAQ. The date in brackets before some paragraphs indicates when they were most recently updated.
I'd also like to thank the many readers of my web page and the TRV900 mailing list for sharing their ideas and pictures with me and the greater Internet community. Thanks folks!
John Beale
Fremont, CA
Sept. 2001
As of July 2002, the TRV900 model has been discontinued by Sony in favor of the new DCR-TRV950. I am keeping this FAQ online as a reference for current TRV900 owners, and those buying used. As of 2003, I believe it is unlikely that you would find a new, unused TRV900 anywhere but you can still find a used TRV900 on Ebay and other online auction sites. Do be aware of the risks of buying sight-unseen; check out your potential vendor as well as possible. If you buy a used camera, read Doug Graham's article on buying used (many other good articles at videouniversity.com, by the way.) See the end of this FAQ for a few mechanical problems that a TRV900 might develop.
I am not a vendor myself. If you wish to locate an authorized Sony vendor, call Sony. As of Feb. 2002, that web page lists USA phone numbers for Product inquiries and Dealer/Servicer locations as (800) 222-7669 (voice), (941) 768-7669 (voice), (941) 768-7790 (fax).
Cautionary Tales Department: some mail-order and online places advertise amazing rates on camcorders in the backs of photo magazines, on the Web, etc. but if you believe you'll actually be able to get these prices, I advise you read this note and the letters here. This camera is very popular, so many retail and mail-order outlets do have it, but I'll let you do your own shopping. Please note, if you're not familiar with a company it's good practice to check their rating before buying from them, with the Better Business Bureau. Reputation is important. You might search deja.com to see if any relevant consumer experiences have been posted to a newsgroup. Please consider the survey of mail-order photo/video stores, the reseller ratings site, the complaints at consumeraffairs.com and the information at photo.net before ordering from an unknown source. As user comments there document in horrifying detail, certain companies advertise great prices and then may do a number of things you didn't expect or discuss, once they have your credit card. For example, regarding CCI (Camera City Inc.) read note 61 and 71 on this page. Outright fraud or theft, while rare, can happen: for instance read this story. Don't let it happen to you.
Some vendors do not advertise the lowest prices, and apparently expect you to bargain. The comparison- shopping is up to you. When I'm buying a camera or accessory, I check out all the dealers I'm familiar with (in my case, generally the six mentioned above) who advertise the item, and buy the cheapest one that's in stock- no doubt you'll do the same, with your own preferred dealers. Some other places do advertise tempting rates, but remember to check their reputation along with their price.
Warranty: The standard Sony warranty in the USA is 1 year parts, 90 days labor. My Sony TRV900, TR7000 and VX2000 camcorders and MiniDV "walkman" deck all came with the same warranty, which is reproduced here. When I got the camera I got an additional 4-year warranty from Mack for $300 (it is now around $125 I think). This is the Mack agreement. They don't cover "professional use" and they require you to ship the camera to New Jersey and pay for shipping both ways (the card says ...or local service (at their option) but when I needed service and called, they said to ship it). If they determine they can't fix the problem, they will then ship the camera to Sony. I couldn't afford this compound delay so I brought it to the local Sony center and paid out-of-pocket. Sony charges a flat rate for most repairs, currently around $215. If I had to do it again I'd use Sony's extended warranty. The warranty is just an insurance policy; you have to decide if you want to pay now, or (possibly) pay later.
I asked SONY in Germany and they say that a SONY product has a world wide warranty of at least 6 month depending on the rules in the specific country the service is done. I asked then: What if I buy a SONY camera in the USA and have it serviced in Germany? The answer: Warranty time in Germany (by SONY) is one year full service. I have to present the bill that shows the date of purchase and service will be done. -Peter Plewka
For anyone buying a TRV900 or considering an extended warranty... I called up SONY USA and asked how much was their extended warranties if I purchased directly from SONY: 1 year: $99. 2 year: $195. 3 year: $274.95 I had bought my TRV900 at B+H photo/video Tel# 800-606-6969 (http://www.bhphotovideo.com/) for $1999.95. -Kwang Shieh, July 1999
The TRV900 was released in the US in August 1998 and sold until mid-2002. Many people, thinking about product lifetimes of computers and inexpensive consumer cameras, assume that nothing that old could compare with the latest model. People are still using the TRV900 because it is still a very good camera as compared with other compact 3-CCD video cameras now on the market. The various 1-CCD cameras have improved over past versions, and have higher-resolution stills, but most who've compared them directly still seem to prefer the TRV900 for video quality. See also this excellent comparison page, you can ignore the Japanese characters; just click on the model names for sample images. For example, the newer, smaller DCR-TRV30 is worth considering, but I'm told it does not perform as well in low light as the TRV900.
[05/18/2004] I used the TRV900 for four years and it always served me well. In 2002 I sold it, and I currently use the Sony DCR-VX2000 and Panasonic DVX100 MiniDV cameras for paid jobs; these are larger and more expensive tools (the current models are VX2100 and DVX100a.) The VX2k is especially good for event video with mediocre to poor lighting. However, for casual video the TRV900's smaller size is an advantage, and with enough light it can give you professional quality results.
[06/26/2010] There are apparently still people using their TRV900. I am currently using small AVCHD cameras that record to hard drive or flash memory. Most recently the Panasonic TM700 which is impressively small, but performs quite well..
Effective ASA rating means, that's the film speed you'd need to use in your 35mm camera for a properly exposed image using the same f/stop and shutter speed as the TRV900. These numbers are for 0 dB gain in the camera. In auto mode and dim light, after the iris opens up all the way, the camera will start to employ electronic gain up to a max of +18 dB. This gain will increase the effective film speed, as follows:
 Gain   Eff.speed   resulting video image
----------------------------------------------
  0 dB   150 ASA   excellent image quality
 +6 dB   300 ASA   still a pretty good image
+12 dB   600 ASA   rather grainy, flat colors
+18 dB  1200 ASA   very grainy, dim colors
----------------------------------------------
Another way cameras are rated is the f-stop selected in auto mode for a given illumination (for instance the $10,000 Sony DSR-300 is rated at f/11 at 2000 lux). I have heard this is based on a 90% reflectance (rather than the 18% grey card used in film photography). My measurements indicate the TRV900 will operate at f/6.7 at 2000 lux for a 90% white target, or f/3.4 at 2000 lux for a uniform 18% grey (1/60 exposure, normal interlaced scan, 0 dB gain, auto-exposure). The TRV900 has a f/1.6 lens at the widest angle setting. So, you will need 440 lux for a bright video image with no graininess (for auto-exposure to set f/1.6 at 0 dB gain for a 18% grey subject). (Conventional photographic wisdom is that the average reflectance of the average subject is 18%; your subjects may vary.)
So what does this mean, you may ask yourself? Well, 440 lux = EV 7.5, which the very useful exposure computer subjectively describes as somewhere between stage show and indoor sports, and night football lighting. If you use f/1.6 plus 6 dB gain, you have a reasonable but not ideal video image at 200 lux (EV 6.5), still somewhat more than a home interior at night. I measured that level at a distance of just one foot from the lampshade of a 100W light, or 4 feet away from the bare bulb. (You can see why professionals use bright video lights!) At the low-light extreme, if you use f/1.6 and +18 dB gain (8x more light sensitivity) and 1/4 sec exposure (15x more sensitive than 1/60 sec) I calculate 3.7 lux is needed for this very jerky, grainy video image... but maybe this is where Sony gets the 4-lux sensitivity they advertise for this camera! Remember if you zoom in, the lens is f/2.8 on the long end, which means 3x less light enters relative to the widest setting. By the way 1 foot-candle = 10.74 lux. (Note: an earlier version of this FAQ had an incorrect Lux<->EV conversion. I believe this one is correct.)
Subjectively, the camera can see about as well as I can with my naked eye at 1/4 sec shutter with no additional gain. It can see more than I can when you add +18db gain but again the signal is rather grainy/noisy. Gain is also manually controllable from -3db to +18 in 3db steps. See also my collection of comments from email/news here.
By the way, if you don't need color, the inexpensive black-and-white "security" type cameras are better at low-light than any color camera you can probably afford. One reason is that they don't have the infrared filter that color cameras need to reproduce good color, so they make use of a wider spectrum of photons. I believe the "night shot" mode on some Sony models (not the TRV900) just mechanically removes the IR filter, essentially turning it into a B/W security camera. Nightshot models also have a small built-in IR illuminator (IR LED's).
The dichroic prism in a 3-chip camera simply divides the incoming light into red, green, and blue components and routes each part to its own chip-essentially all of the light (I'll guess better than 90%) actually gets to a CCD chip surface where it is useful in forming an image. (Note that this prism is a beamsplitter with internal interference-type (reflective, non-absorbing) filters, and not a dispersive prism of the sort you can make a rainbow with.) There are additional complications since CCD chips have a dark level which varies with temperature and individual pixel, and there is electronic readout noise; both these factors make spreading your photons over three chips more noisy than using a single chip, other things being equal. Different CCD chips have different fill factors, surface reflectivity, and quantum efficiency. In sum I think the 1-chip vs. 3-chip low-light debate to be difficult to decide "a priori"- you need to compare the actual cameras directly and choose on that basis.
NOTE: If you use progressive mode in dim light, all other things being equal, you will notice the image is one full stop darker than in normal-video mode. It's not clear to me why this should happen, but it does. You'll need more light, or use extra aperture, gain, or lower shutter speed to compensate. You can't go slower than 1/60 sec. in "memory" (PC Card/disk) mode. You can go down to 1/4 sec exposure while in video (tape) mode, but you might as well use interlaced scan in that case. To my eye, the actual progressive mode resolution isn't any different from interlaced mode when used below 1/60 shutter speed.
Note that while the filter diameter on the TRV900 is 52mm, the actual final lens has a diameter of 27 mm, which is similar to cheaper compact camcorders. One advantage to a larger filter diameter is less chance of vignetting with one or more filters stacked together. When I use my Kenko 2x teleconverter, which has a 67mm objective, I seem to get a brighter picture (for equivalent total focal length), because I can use the internal zoom at setting with a wider f/stop.
[01/01/01] People who shoot weddings usually need the best possible low-light performance. One wedding videographer suggested that an older, 2/3" single-chip camera would work better in low light. This makes some sense; it would have 2.4 times as much total CCD area as three 1/4" chips, and presumably a correspondingly larger lens to let the light in. By the way, if you have $2500 for a wedding camcorder I would recommend the Sony VX2000, due to its superior low-light performance. Remember, both TRV900 and VX2k cameras can use slow-shutter for improved low-light response. This makes motion appear more jerky or stroboscopic, but 1/30 sec shutter is usually ok, and 1/15 sec may be ok for scenes with very little motion. 1/8 and 1/4 sec is more of a special effect, and of more limited use, but try it out sometime and see! You may also find these wedding tips useful.
In direct comparisons on the feature shoot I'm working on the XL1 is somewhat better in low light than my TRV900; it's not dramatically better, but there's definitely less noise in the shadows on the XL1 when using identical exposure settings (...) And by low-light we're talking rooms lit by burning torches here, not properly lit sets.
TRV900 is ok for weddings. Bob Andersen Tue, 24 Aug 1999
I use a TRV900 and an XL1 as my main cameras and a TRV9 for my cut away camera:
1. In almost all shots the TRV900 looks as good as the XL1.
It certainly looks good enough.
2. I use the TRV900 and the XL1 for receptions.
I charge between 1500-2000 per wedding & will be raising
my prices to 1800-3000 depending on the options (In Raleigh, NC). I
edit them on a NewTek Flyer. I've done 30+ weddings over the last
3-4 years. What I have found is:
When I show the bride & groom their video there are
always some parts that are too dark or a little too grainy because
I boosted the brightness with a proc amp. You know what? The B
& G never notice. They will laugh because Aunt Tessie is doing
the twist, and cry if 90 year old grandma leaves her wheel chair to
dance, BUT WILL ALMOST NEVER complain about the video quality. It's
a content thing pure and simple.
-A customer will notice bad audio right away.
IMHO the TRV900 is perfect for weddings. If I had to do it over again I would have bought 2 TRV900's instead of the XL1. Please note that I would have to verify that the V900 could handle my audio needs...the XL1 does a great job here.
Most Sony single-CCD cameras have a "nightshot" mode, which gives better performance in dark conditions by physically removing the IR-cut filter in front of the CCD (used to improve color imaging in normal light), along with a built-in infrared LED to illuminate nearby objects. It is a monochromatic mode, and somewhat unnatural-looking due to the differing reflectivities of objects in the near-IR (700-900 nm wavelengths). If you want to take images of nocturnal animals, do surveillance, or any other video in very dark conditions, you need one of the single-CCD cameras that does have nightshot.
The TRV900 records on 60 minute MiniDV tapes in SP mode (1 hour) or LP (1.5 hour). The PD100 records in DVCAM format only, which is 1.5x faster than SP mode. Thus, you get 2/3 the recording time (40 minutes instead of 60 minutes per tape). MiniDV and DVCAM formats store identical audio and video information, but in DVCAM the audio samples are locked to the video timebase, and (due to wider track pitch) has better interchangability between decks (Sony decks of course, since DVCAM is a proprietary Sony format). The compact-format 40-minute DVCAM tape is physically the same size and length as the 60-minute MiniDV tape, and you can also use tape labelled DVCAM in a TRV900, likewise MiniDV tape in a PD100. I don't know if there is any physical difference between the tapes, apart from the label (and the price). Apparently, both cameras can read both video formats, but only record in their "own" format.
The PD100 (DVCAM) has audio locked to the video sampling rate, and the TRV900 uses unlocked audio. Since MiniDV is only unlocked short-term (it maintains at most 1/3 frame offset longer term) there may be little difference in many applications. See www.adamwilt.com/DV.html for the details and the implications.
The PD100 claims 12x zoom on the side. The TRV900 claims 48x. In fact, both have 12x optical zoom and 48x digital. (Like all digital zooms, it looses resolution and I don't find it of much value.)
The PD100 has two zebra settings (IRE70, IRE100). The TRV900 has only IRE100.
The TRV900 has "LaserLink": IR composite connection to a TV, the PD100 doesn't.
The PD100 allows timecode reset to zero. Not a lot of use but it's missing from the TRV900.
Internally the PD100 has (according to Sony) handpicked components. Sony claim the CCD block is noticeably better. Also that the PD100 has a stronger case(?). I saw a Sony demo where it was shown (not all that clearly) that the weaker TRV900 can flex under the weight of heavy lens attachments and the PD100 doesn't.
The PD100 comes with a wideangle adaptor with hood, and a XLR adaptor which can provide +48v phantom power.
The D8 cameras are the cheapest digital video recorders now
available. I have the cheapest, the TR7000 and use it as a digital
VCR. They record true DV signals over firewire just like any other
MiniDV or DVCAM recorder. I put some more notes and a few still
frames here. If you don't need the still-image
features and 3-CCD image quality of the TRV900, a Digital8 model
might be an attractive choice.
[05/18/2004] The current model is the GL2, you can read about that camera at the Canon GL2 Watchdog.
The camera has a stereo mic input jack ('plug-in power': it supplies about 2.3V bias through 10k ohms, for powering electret mics). From a menu button you can have a sound level meter show up in the viewfinder, and adjust the record level (or set it to AUTO). The meter and level adjustment is mono, that is acting on combined L+R audio. You can select 16 bit at 48kHz, or 12 bit at 32 kHz audio sampling, but there is little reason to choose 12 bit audio.
If you do record audio in 12 bit mode at the SP tape speed, you have the option to dub a second audio track later, after recording the video. Unlike the Canon XL1 you can't record two stereo tracks at the same time, you have to rewind and add the second one as an audio dub later. You can dub second-track audio from the built-in mic, the mic jack, or via the A/V input jack (which doubles as output jack). You can't hear the first track while dubbing the second. This capability to dub a second track is very seldom used because computer-based video editing (NLE) is now commonplace, and it offers much more flexibility and convenience.
Note, the A/V line level input is active only in VCR mode. In camera mode (recording video through the lens) you can only use the mic jack for external audio signals. If you have an external line-level source, you need an attenuator (some XLR adaptors will do this.)
I just tried the experiment in a closet to muffle even the faint outside traffic sounds. My voice was deafeningly loud on the recording, but when I was quiet, I could hear no motor noise. Correction: there was a little motor buzz-noise when I held the recorder near the door (a large, flat, hard surface). My theory is the sound coming off the tape drive bounced off the door and back to the microphone. How it avoids getting conducted directly through the case I don't know- but it works!
Another interesting note: at max gain, if you are listening as you record on headphones, you will hear a quiet buzz when the camera is in standby. This goes away, entirely, when you start recording- even though just listening with your ear next to the cassette compartment, the buzz from the tape drive is louder while recording. Mysterious. At max gain, by the way, you can rub your fingers gently together several feet from the microphone and it sounds loud.
Later note: Well, I can hear some buzz-noise on the soundtrack during playback at the moment the camera starts recording, but it fades quickly to inaudible over about one second. It might be a DSP (digital signal processor) with an adaptive filter algorithm which is "locking-in" to the interfering signal and cancelling it.
I tried recording myself playing my classical guitar, which is a quiet instrument and difficult to record under any circumstance. The TRV900 picked it up fairly well, along with the refrigerator in my apartment when that came on. There was some hiss which you get with any small condenser microphone set at high gain. Note this was only an experiment- as with any camera, for critical recordings, I'd recommend a suitably located external microphone. I describe a few such mics here including sample sound clips. I think the TRV900 is fully adequate for home recording. If you have truly professional audio requirements you may need to resort to an external MD or DAT, then align the soundtrack with the video in post-production. See also the microphone, XLR adaptor and audio mixer sections of my accessories page. Note, there is apparently some unit-to-unit variation in the noise level of the camera's mic preamp.
Subject: Re: Hiss on the TRV900?
From: "Clifand" (clifand at aol com)
Date: Wed Apr 12 14:33:05 2000
Newsgroups: rec.video.production

> No annoying levels of hiss on my TRV900. I monitor recordings with
> headphones (post production) hiss is not a problem. I believe the TRV900
> is nearly as good as my Sony DAT recorder

My first TRV900 had an unacceptable level of hiss.  I returned it a got a
second one without the hiss problem.  At that time, another participant in
the newsgroup said he was aware of a hiss problem but obtained a TRV900
without it. For over a year and until now, I have not heard anything about
this hiss problem.  -Clif
If you want to record sound in two places, you must use two
external mics; you cannot record using both the camera's internal
mics and an external mic at the same time.
The stereo minijack TRV900 mic input features so-called "plug-in
power" which means the camera injects a few volts of bias on the
mic input, which can power some small consumer-type electret mics
that don't have their own battery (although most do have batteries
anyway). This is a feature common on Sony cameras and recorders. It
is NOT the same as, and not to be confused with the +12 or +48 V
"Phantom" power which is used for powering professional
condensor-type mics on balanced lines (typically with XLR
connectors). In any event the XLR adaptors referenced above use
transformer coupling, so the TRV900's mic input DC bias does not
reach the external source and does not affect it.
Name
Compression Approx. size
----------------------------------------
SUPER FINE
1/4
150k
FINE
1/6
100k
STANDARD
1/10
60k
----------------------------------------
All three types of JPEG image files have 640x480 pixels, so your images will have the proper 4:3 video aspect ratio when viewed on a standard computer monitor or printed. The DV format video is 720x480 with non-square pixels (for NTSC cameras anyway).
The camera uses PCMCIA Type II ATA flash cards. (The only difference between Type I, II, III PC-Cards is thickness. Type I is thinner and ought to work but I haven't tried it. Type III is thicker and won't fit.) They are sold by many computer stores for instance www.buy.com or alix.com. Full-sized PCMCIA flash cards are rare and expensive, so what everyone uses is either a "compact flash" card, or a (Sony proprietary) "memory stick" in a PCMCIA adaptor. I have a 30 MB SanDisk and a 128 MB Mr. Flash compact flash card, and both work fine. They go into a full-size PC Card (PCMCIA card) adaptor (about $10, sold wherever flash memory is sold) which in turn goes into the camera. The camera indicates I can store 152 images in "super fine" quality. This varies depending on the detail in the images: after taking a few snapshots the camera revised this estimate to 153, then 154. There is something called "SmartMedia" which can fit in a type II PC-Card adapter. One user reports this does not work correctly with the TRV900. Another said it works fine. The one reported to work is Philips SmartMedia memory card AY3957 (3.3v 8M), along with the Philips SmartMedia Adapter AY3951 (works with 3.3V and 5V memory modules) If you're buying a flash card, also check my accessories page.
You can transfer still images from the PC Card to the DV tape, or the other way. There is a "slideshow" mode in which the camera will display each of your images in turn from the PC Card, for two seconds. (Unfortunately you can't transfer the whole slideshow to DV tape at once, unless you have another, separate DV recording device.) If you're taping an event, you can wander around a bit before and after the event taking still photos onto the PC Card, which you can later import into your PC, superimpose titles on, and then write back to the tape at the appropriate points. Voila, excellent digital quality titles, without a Firewire card! See also "How can I play back JPEG files" below.
I bought a DataChute PCMCIA Card reader (Antec Inc. Fremont, CA http://www.antec-inc.com ) for my desktop PC and it sometimes worked on my home system. Later I got an Antec USB PhotoChute PCMCIA/SmartMedia reader and it worked fine until I tried to do video editing when it caused glitches. I currently use a Comotron USB 6-in-1 reader (compact flash, memory stick, Smart Media, MMC, etc) which works fine all the time under Win2k.
I've used this setup to check lighting ratios in a 3-point strobe lighting setup, and it worked pretty well. In this way I am using the TRV900 to replace a polaroid camera which you'd normally use to do the same thing. The '900 does lack the dynamic range and resolution of film, but of course it's instant results, plus zero incremental cost per shot.
You can adjust the camera's exposure by changing the f/stop, and with an external flash you'll probably need to. You can also change the shutter speed but you loose flash synch any higher than 1/90 sec, giving you a dark frame.
Specifically: I've had success with modified TRV900 pictures and also scanned images from other sources. I've tried Adobe Photoshop 4.0.1 LE, ULEAD PhotoImpact SE 3.01, and ThumbsPlus 3.30 (shareware from www.cerious.com). Photoshop is the most difficult. Here's what to do:
The camera can read files saved from PhotoImpact or ThumbsPlus in any Quality setting from the minimum right up to 100%. However, I have looked closely at the video output with highly detailed test files, and can see no differences above Quality=85%.
None of the programs I know of will generate a valid "index" image for the TRV900 6-photo-per-screen index mode, they just appear as black squares; but the full-screen version of the image should work. All of the above is on a PC/Windows platform. I've been told that for writing JPEG images that the TRV900 can read using the Mac, Photoshop doesn't work, but GraphicConverter from Lemke Software does.
You can fix this manually in your paint program by using a gamma correction factor of about 1.2 or so. You may want to slightly increase brightness and contrast also. For instant results, if you are using Photoshop, you can try Image->Adjust->Auto Levels (Shift+Ctrl-L) which often fixes things in one step. If Photoshop is too expensive (or even if it isn't), I recommend the "ThumbsPlus" shareware image utility from www.cerious.com-- I use both programs frequently. "Thumbs" has several auto-processing functions, for instance Image->Process->Improve Video Capture (Shift-V) which does a histogram stretch, plus a "sharpen" step. If you are adding titles and then sending them back to the camera, remember that any "gamma correction" you do will probably make the image too bright on the TV! I've tried to adjust my computer monitor brightness and contrast settings to match the TV images, with some success.
Here is an email from Ira Solomon:
Opening a TRV-900 JPEG in PhotoShop 5 was terrible. Dark doesn't begin to describe the result. Almost black. And I found it almost uncorrectable. Intellihance produced a poor result, although better than the original. I eventually found out the cause. The fix requires going to Preferences on the File menu. Under that you want profile. In there change the mismatch setting to "ignore". Now the pictures will open in a usable way. This problem will not occur in the previous versions of Photoshop.
There are several programs which make panoramas from two or more still images. Spin Panorama from pictureworks.com, PhotoVista from livepicture.com, and QuickStitch from enroute.com are three that various TRV900 owners have found to work. PixAround does interactive 360 panoramas for the web (a la Quicktime) using JPEG and a java applet. James Rigg's Panoguide.com reviews 14 software packages, and has everything you need to know about panorama techniques, and more.
Still frames from the TRV900 have only 480 lines vertically at best. That's in progressive scan mode. In normal video mode, a still image uses only one field of a full frame (that is, half the 480 pixel vertical resolution) and that hurts you even more with near-horizontal lines. The exported JPEG is in fact 640x480 in either mode, but in regular interlaced video mode, every other horizontal scanline of the still is interpolated and the jaggies, for the most part, remain. If you want to take clean images with thin, high-contrast diagonal lines, try progressive scan mode (or better yet, use a film camera :-). Having said that, I feel the camera does quite well, for example this image (TRV900, progressive scan) has many near-horizontal lines and I see no jaggies at all.
But no, you can't address the memory device directly through the PC's operating system via firewire as if it were a hard drive, it doesn't work that way. The camera's firewire port is limited to the DV protocol which permits only the standard DV (video) datastream to be transferred.
1: PAL is 25 pictures a second.
2: NTSC is 30 pictures a second. (the number of scan
lines also differs)
3: DV is neither PAL or NTSC, but comes in a 25 p/s and
30 p/s version.
4: Through the lens, a PAL TRV-900 records 25 p/s, a NTSC
model 30.
5: From the digital port a TRV-900 (any model) records
what comes in (25 or 30).
6: From the analog plugs, a TRV-900 will only record the
standard it advertises (PAL or NTSC).
7: If you have a DV cassette recorded at 25 p/s (from a
PAL camcorder...), and play it on a US TRV-900, that machine will
output a non-standard signal at 25 p/s with NTSC 3.58 color
encoding. Most TV will play it fine, but VCRs won't record it. From
that tape, it will also output a standard PAL DV stream via
firewire.
7bis: If you have a DV cassette recorded at 30 p/s
(from a NTSC camcorder...), and play it on a PAL TRV-900, that
machine will output a non-standard signal at 30 p/s with either
NTSC 4.43 color encoding or PAL color encoding (choice in the
menus). Most TV will play it fine, but VCRs won't record it. From
that tape, it will also output a standard NTSC DV stream via
firewire.
8: None of this cameras will convert the frame rate (or
the number of scan lines). This is the key in understanding what
the cameras do when faced with the "other" standard (that and
understanding that you need different oscillators for 3.58 (NTSC)
and 4.43 (PAL and NTSC 4.43) and the camera only has one).
9: The TRV900 will record still images from the PC card
port in its native format only, i.e. if I put a NTSC-recorded
cassette in it and add a few seconds of video from a jpeg file,
that part is recorded in PAL.
If you have an analog video signal in one format and want to change it to another format, you need a video format convertor box. TENLAB is one manufacturer, and you can read more about them here. If you have a DV file on your computer you want to convert digitally, you need a software format convertor, for instance the one from Canopus.
If your only need is an occasional VHS tape in the other format (eg. NTSC to PAL or the reverse) to send to friend/family abroad, your best bet is simply to have it done by a local photo/video shop. In your local Yellow Pages under "Video Tape Duplicating & Transfer" you will find such services. I've done this and obtained a "first-generation" PAL dub from my NTSC MiniDV tape, by physically carrying in my MiniDV deck (or camera) to the duplication shop and having them take the A/V out cable directly into their converter.
Subject: PAL playbackThe most interesting aspect of the TRV-900 for me has been the PAL compatibility. But the 900 has been a little high for my budget. So I wanted to test to see if this ability was included in other Sony camcorders. So with the help of a friendly dealer, I spent the afternoon testing with a PAL DV tape.
From: Chris Williams (paint_progs at hotmail.com)
Date: 4/29/01
No [USA model NTSC] Canon camcorders, including the XL-1, have the ability to play PAL DV tapes. [Canon does sell PAL camcorders (eg. XM-1) in Europe and elsewhere, but they don't play NTSC tapes. -jpb]
*All* the Sony Camcorders I tested were able to play my PAL DV tape, show the image on their LCD display and output to FireWire.
The camcorders I tested were:
DCR-TRV900Nobody who needs a DCR-TRV900 should avoid buying one. But if all you need it for is to playback PAL DV, the dirt-cheap DCR-TRV20 (currently being sold at this local store for $999) might be a better choice.
DCR-PC100
DCR-PC110
DCR-TRV20
DCR-PC5
Various places in the US, such as B&H Photo advertise PAL video
equipment for sale. PAL equipment sold in the US almost certainly
does not come with a US warranty, because as far as I know, Sony
does not officially sell any PAL equipment here. You have to ask
the vendor exactly what warranty you get, and what your service
options are here, or if you live/travel in Europe. However, I don't
think there are any "bad" Sony cameras, I think they are all made
in a few factories in Japan and they are all of similar
quality.
I've tried still pictures at every zoom setting, and even with an add-on x2 telephoto extender (Kenko VC-200Hi). The progressive scan stills look sharply focused at every setting (hence regular video, at lower resolution, will be as well). I have not observed the focus to drift as you zoom out from extreme telephoto.
Focal Length    Field of View (degrees)
20 mm            84  x 62   <- using 0.5x wide
28 mm            74  x 49
29 mm            64  x 45   <- using 0.7x wide
35 mm            59  x 39
41 mm            47  x 33   <- TRV900 stock lens, wide
50 mm            40  x 27
105 mm           19  x 13
200 mm           10  x 7
400 mm           5.1 x 3.4
500 mm           4.1 x 2.7  <- TRV900 stock lens, tele
1000 mm          2.1 x 1.4
distance h. size
------------------
6"
1.9"
9"
2.25"
12"
2.75"
24"
4.0"
-------------------
So, you can get a full-frame shot of a 4" long insect (are there any? preying mantis?) from 2 feet away, without adding any external lenses to the camera. If your insects are very shy, try a teleconvertor. With my Kenko VC-200Hi 2.0x teleconverter lens and using the camera at maximum telephoto, I also get a frame size of 4", but from 7.5 feet away! The resolution on this camera is very good, so you might be happy with the result even if the image was less than full-frame.
Meanwhile, I bought a set of 52 mm thread, +1,+2,+4 diopter "close-up filters" AKA macro lenses (more often used with still cameras). B&K Photo sells them, among others. The diopter rating is the inverse of the focal length in meters, for example, a 2 diopter lens has a focal length of 0.5 meters (which is 20 inches). The "+" means it is a converging (convex) lens. So, using a +2 lens means you'll need to be about 20 inches away from your subject (if you focus the lens at infinity, somewhat closer otherwise). You can also combine the close-up and telephoto lens for intermediate magnifications at a longer working distance. Carroll Lam (cassie at dakotacom.net) contributed the following:
| Lens combo | Distance | Size |
| +1 | 22.5 (572) | 1-11/16 (43) |
| +2 | 12 (305) | 1 (25) |
| +4 | 8 (203) | 5/8 (16) |
| +4+1 | 6-3/4(171) | 1/2 (13) |
| +4+2 | 5-1/2 (140) | 7/16 (11) |
| +4+1+2 | 4-3/4 (121) | 3/8 (10) |
Here is a more comprehensive list from the same author, showing field size ("Image size") and focal length ("Subject-to-lens") at near and far focus points for every diopter-lens combination from +1 to +7 power, with all dimensions given in inches.
Note also, this camera works best with outdoor daytime light levels. I thought microscopes often work at very high f-numbers in the optical system meaning you may need very high illumination levels for the best image, but I'm not very familiar with the details. If you can use a "standard" color video camera on the microscope, the TRV900 ought to work as well, light-wise. Well, if you have slow-moving subjects you can use a slow shutter speed too (down to 1/4 second), for better images in lower light.
For colder weather you may want to investigate chemical heat packs, like skiers use to keep their hands warm. The one commercial heated jacket I know of, the "Polar Bear" from Portabrace, is only for large shoulder-mounted cameras. Howard McCollister posted the following to rec.video:
I have a friend that puts his Handycam inside an electric sock, the kind that work off a D-cell battery. He cuts a hole for the viewfinder, and a slot to slip his hand onto the grip. Seems to work very well. A lot cheaper than the commerical camera muffs...
H. McCollister
Note that I'm talking about the recorded video image; regardless of your lens filter, of course the fold-out LCD display is also washed out by sunlight, which you can improve by using a shade such as the "Hoodman" product.
(2) Turn on the camera's internal ND filter (about -2.5 stops).
(3) Set the internal gain down (menu selection GAIN SHIFT: -3db).
(4) You can manually increase shutter speed, and you can enable the menu option (AUTO SHTR: ON) that allows the camera to automatically increase shutter speed in bright conditions as necessary, but this has the usually annoying side effect of giving a "strobe-effect" to fast motion. However, fast shutters are useful if you want to extract non-blurry still frames later.
Some pro video shooters prefer to just set the manual exposure by eye, based on contrast judgements in the viewfinder, but I feel this takes real experience- playback on my TV usually looks somewhat different than it does in the viewfinder. You can use the "zebra bars" menu option to tell you which areas will be overexposed (pure white) but again, it's a judgement call how much solid white you want in the frame- for a dim interior, probably none, but for a snowy scene, it might be quite a bit.
I do not have experience with broadcast production*. It's hard for me to imagine NTSC video looking any better than this, but I haven't seen what a pro camera on a studio monitor looks like. All I can say is, if you've got good light, I would be very surprised if anyone objected to the image quality.
*Well, I was an extra in a CBS (?) "Movie of the Week" about eight years ago, if that counts. They shot on film (35 mm I think) and the amount of money they lavished on that production was stunning to behold, and a bit sad, since the movie was entirely forgettable. Part of the camera is visible behind me in this shot of some of the extras.
If we are talking about a feature-length film you should realize this costs several tens of thousands of dollars. Transfer of a 90 minute feature to 35mm film runs about $35k from DVFilm or Takafilm, or $52k from the Sony High-Definition Center. Victor Khong lists some more companies on here. If you are talking about this kind of money, I think an extra $2k for a better video camera seems reasonable.
There are many different video compression formats available to use for your web or CDROM production. For CD-ROM applications, I would recommend MPEG1, one of the oldest compression formats. Quality can be very good, and MPEG1 viewers are already present on most machines. There may be advantages to MPEG2 but decoders are less common. The new MPEG4 format may give the best quality per megabyte, although I've had trouble getting this format to play properly on a slow machine (640x480 playback may need more than a 500 MHz P3 anyway). For web pages, I'd consider MPEG1 for downloads, or the real-time streaming formats like ASF (MPEG4), Real Video, and Quicktime. By the way, MPEG-4 is a complex format that encompasses much more than just video, see the MPEG-4 Standard.
The original DV is 720x480 pixels, 30 fps (NTSC) or 720x576 pixels, 25 fps (PAL) but for these applications you will end up using lower resolution and often lower framerates to match the abilities of CDROM drives and the Internet to deliver data, and the host computer to decode it. "Streaming" web video shows up in real-time on your web browser. It is very highly compressed and this has consequences for quality. As you'd expect, streams at ISDN or T1 datarates will look better than those intended for 56k modems. If you want to see some examples online, check out the movies at ifilm.com.
Ulead MediaStudioPro (Ulead MSP) 6.0 can directly create MPEG1, MPEG2, Microsoft ASF and RealVideo formats from your DV format file. I believe Adobe Premiere 6 can also. Some MPEG1 and MPEG2 creation tools are free downloads, for example TMPGenc and bbMPEG. If you have a Canopus DVRaptor or other Canopus product, you can use their software to convert to the ASF format.
[3/21/01] Microsoft makes a free MPEG4 encoder. Microsoft's version of MPEG4 is called ASF (advanced streaming format). As of March 2001, the Microsoft ASF encoder is called Windows Media Encoder 7. It generates files which can be played back by the Windows Media Player 7. Both of these are free downloads from this page.
There are various other MPEG4 encoders, including several variants called "DivX", which may or may not be compatible with the MS Player- it does not work with version 7 of the player, I think. I don't know if these other encoders have any advantages. DivX seems to be most often used by those making copies of DVD movies. There is some DivX information at this page and no doubt your favorite web search engine can find much more.
There is a lot more to the topic than what's mentioned here: if you are investigating video formats to produce your own multimedia CDROM or website, I have found Terran has a very useful Codec Index at their Codec Central web page, which lets you know what's available in this field. There is a magazine called Streaming Media devoted to the topic.
A VideoCD won't give you DV quality, but there's little question that CDs (even writable CDs) are more durable and long-lasting than VHS tape (whether the appropriate VideoCD playback machines will be handy in the future, is another question). Be aware that to play your VideoCD, you need a player which (1) reads VideoCD (some DVD players do, others don't) and (2) can read the CD-R or CD-RW media you wrote it on (many DVD payers don't). I have owned a Pioneer DV-414 which played VCD on CD-R with some dropouts, and a Philips DVD 825 and Afreey LD2060 which could play VCD/CD-R with no problems. If you get into VideoCD burning you may find it a maze full of twisty passages, all different. To aid you, there are MPEG1/VCD FAQS, also a VideoCD making guide and another VideoCD FAQ. I have found the comprehensive CD-R FAQ and www.vcdhelp.com very useful as well.
By the way, Adaptec EZ CD Creator Deluxe gives you a basic VCD making tool but if there's a full-featured VCD authoring package aimed at the consumer, I don't know about it. VideoPack 4.0 from CeQuadrat retails for US$990.00. "MPEG Power Professional" (US$500) is supposed to be a good MPEG1 encoder from heuris.com. You can download bbMPEG and AVI2MPG2: these are freeware Windows programs that convert AVI files to MPEG-2 or MPEG-1 (including VideoCD and SuperVCD). Some claim that de-interlacing first with Virtual Dub improves VCD quality. I find TMPGEnc works very well for converting DV to MPEG1 at VCD or higher bitrates. If you want to try newer and less-standard video codecs, Media Cleaner EZ4.0 is a free download (for Windows).
Subject: Re: Jump to DVD (how about SVCD?)
Date: Tue, 11 Apr 2000 16:12:20 -0400
From: "Harry S"
One cheaper solution than the DVD-RW solution mentioned is SVCD. SVCD is a format orginated in China and is basically MPEG-2 video at 480 x 480 NTSC at bit rates up to 2.5Mb authored onto a regular CD or (or very cheap) CD-R. This allows for about 40 min. of video on a CD at the higher data rate. (The 480 x 480 is stretched automatically in SVCD players to standard 4:3 aspect ratio NTSC)
I have been experimenting with this format, and it seems to be a pretty good compromise. It is far better than standard VCD format, but not quite as good as DVD. I would rate it about a very good SVHS quality.
What I have done is use DV footage from the TRV900 captured in Premiere and using the freeware program bbMPEG (available as a Premiere plug-in) produce MPEG-2 video and audio streams compliant with the SVCD standard. Then I use the program I-Author by EnReach which produces an SVCD image file that can burned on to a CD-R using Adaptec CD Creator. (Unfortunately, no Mac solution yet to author SVCDs)
How do you play SVCDs? Well there's a catch here! Most DVD players won't, but a super cheap DVD player from China introduced in the U.S. does - the Apex AD-600A (at about $170). There are some programs which allow you to play SVCDs on PCs as well. There are also stand alone SVCD/VCD players available in Europe and Asia too.
Just a far cheaper alternative I would suggest looking into. More information on SVCD from philips.com (.pdf documents from the Philips web site) - Harry S.
As of April '00 the basic I-Author package costs US$1000. If you use Linux, you might want to try VCD Tools which reportedly can create double-bitrate and SVCD as well as normal VCD formats, and is free. That webpage claims "most" DVD players can play double-bitrate (2500 kbit/s) VCDs which have better video quality than the standard 1152 kbit/s MPEG-1 file in a normalVCD. I like TMPGEnc (Tsunami MPEG Encoder) for MPEG1 and MPEG2 encoding. I found this TMPGEnc/SVCD page a useful additional resource. Nero 5.0 from Ahead Software will make a SVCD format disk from a compliant MPEG2 file. Jukka Aho wrote a useful SVCD Overview including links to other SVCD authoring software. There is a useful page regarding TMPGEnc for SVCD making here. You can read some of the standard specs in this Philips SVCD Technical Note. Not all DVD players can read SVCD; I think most older models can't. The Raite AVPhile 715, the Apex 600A, the Afreey LD2060 and Sampo DVE-620 (see below DVD notes) are a few that can. Here is a AV715 user page. There is a large VCD/SVCD/DVD-R/DVD-RW compatibility list at www.vcdhelp.com. People are saying good things about the Dazzle DVC II, a card that can record video in MPEG1 or MPEG2 format for burning to VCD, SVCD or (in theory) DVD format disks. 'Heyday' has a user site for the card. The Amoisonic VDR2000 is a hardware box which can record VCD or SVCD in real time.
There are also stand-alone DVD writers which do not need a computer, in theory these are easy to use like a VCR. One such product is the Pioneer DVR-2000, see the description here. You can buy DVD+R hardware also, but the advertising hype claiming these disks were "more compatible with existing players" than DVD-R doesn't seem to have panned out.
There are several companies offering to create a DVD for from your MiniDV tape (or SVHS, etc.), for example Jason Foodman at SwiftDVD, Ian McDermott at BT Media, and Excel Productions.
[12/29/00] There are some inexpensive first-generation DVD-RAM writable drives out there (2.6 GB per side) but they are for data. They cannot create a standard-format Video DVD (4.7 GB single-sided) which a set-top video DVD player can read. If that is acceptable, maybe the Canopus Amber would be of interest. It is an integrated system for producing MPEG2 video on DVD-RAM, including real-time MPEG2 encoder hardware.
Mini-DVD If you don't have a DVD-R drive, there are a few DVD players which can read the DVD filesystem with MPEG2 video content off a regular, inexpensive CD-R or CD-RW disk, meaning you can make your own "mini-DVD" without an expensive DVD-R writer. However, this is the realm of a few brave experimenters with time on their hands right now; no company is supporting this format. Note; at 9 Mbps, you only get about 10 minutes of DVD quality video on a regular CD, and typically only a specially "hacked" DVD player can play it; see below.
The Afreey LD2060 can play CD-R type MiniDVD discs, and is around $250. The Sampo DVE-620 is basically the same, and there is a Sampo user's forum for it thanks to nerd-out.com. There is more about MiniDVD making at Robshot.com and Bjorn's page. In stock form, I believe these players reliably play bitrates from CD-R only to 2 Mbps which is rather low quality: the standard DVD rate is 9 Mbps. Some intrepid experimentors have replaced the standard EIDE DVD-ROM unit in the Afreey or Sampo DVD player with a faster one, eg. the Afreey DD4010E.
I have the LD2060 and it plays a "miniDVD" I made with TMPGEnc (MPEG2 encoding), DVDMotion CE (DVD authoring), and Nero 5.0 (CD-R burning). My MiniDVD disks play smoothly only at 2.5 Mbps rate; higher bitrate files skip and freeze-frame, and when I tried to upgrade the LD2060 with two different faster EIDE DVD units, it didn't work at all.
The DVD format employs MPEG2 compression (4:2:2 sampling, interframe motion estimation etc.) which is more complex than the DV format used by the TRV900 and NLE systems based on DV. Commercial MPEG2 encoding is done in hardware, for speed, but there are software MPEG2 encoders, for instance from Ligos. You can find out more about DVD hardware from brouhaha.com or visit the DVD FAQ. This DVD Page is full of useful info as well. DVDIt.com sells DVD authoring software and has some related information. SpruceUp is a fairly cheap DVD authoring program.
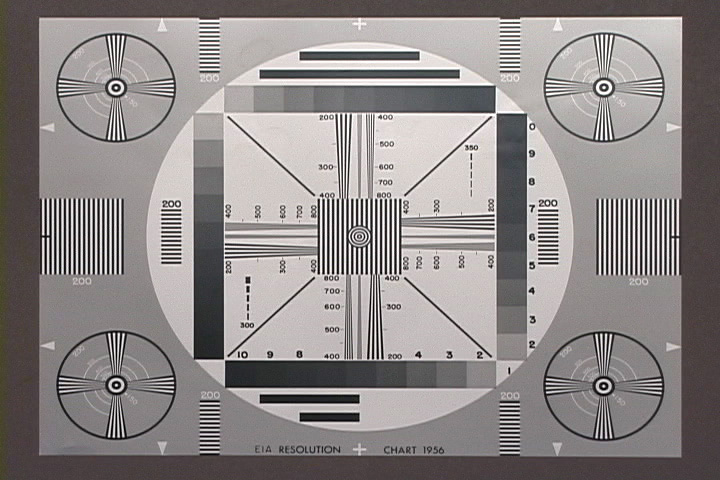
Note 0: European cameras use PAL format which generally means higher resolution than the US NTSC format, but for digital, I think both of them have 720 pixels across (?). Note 1: do check out the full review in Sound and Vision; it is extremely positive- they seem to like the camera even more than me :-). Note 2: if you would like a refresher on how video resolution is defined, look at this EliteVideo site.
(...) Shortly after I got the camera I spent some time with a friend who is a professional video engineer, and we compared the '900 to a professional studio camera that he just happened to have handy. The '900 acquitted itself quite well! We estimate that the studio camera had a resolution of some 700 lines, while the '900 came in at around 550 for full resolution, with a limiting resolution of about 750 lines. The VTR part of the deal was still giving us resolution at 5.8MHz - the limit of the measuring equipment to hand.
-Giles Read
Lab Test Gives TRV-900 High Marks
From: bigrocketman3@webtv.net
Newsgroups: rec.video
Subject: Sony TRV-900 Test Report
Date: Tue, 19 Jan 1999 14:40:20 GMT
The tested level of resolution from the TRV-900's camera section was 530 lines, with 500 lines viewable in tape playback. The color viewscreen displayed 410 lines of resolution and the small viewfinder gave 380 lines. The signal-to-noise ratios were the highest I've seen from anything less expensive than a broadcast camera. The weighted luminance reading, from the S-Video output, was -60 dB and the chrominance PM was -56.6 dB. These figures came from the playback of footage recorded from the TRV-900's camera. When a pre-recorded reference tape was used, the readings were -66 dB and -63.6 dB, respectively.
(...) The entire TRV-900 test report and other articles can be seen online at Sound & Vision's website: www.soundandvisionmag.com.
Steve McDonald
You might guess that Sony wouldn't add more resolution to the camera than the DV format can record, but it seems that they have. For the NTSC case, each CCD chip has 34400 extra pixels beyond what's needed to match each of the 720x480 DV format pixels with a CCD pixel. This is about 71 extra pixels per scanline beyond what the DV format can actually record. For the PAL case we have 35280 extra pixels above 720x576, or about 61 extra pixels per scanline. So, why is that?
Normally, CCD chips contain several extra rows of non-imaging pixels which are physically masked off (eg. with an aluminum layer) for dark level subtraction, to correct for voltage offsets due to process variations at manufacture and temperature variations at time of use. Here, I think there are more extra pixels than you'd need for that purpose, which is why I surmise that there isn't a 1:1 match between the CCD and the DV pixel map. Various tests from myself and others indicate slightly higher resolution from the camera's outputs "live" vs. in tape playback, which seems to agree with this interpretation. I think the CCD output (in discrete pixels) is converted to analog video (continuous scanlines), and then internally re-sampled into 720 pixel scanlines for DV recording and firewire output. In theory, the more pixels in the original signal (from the CCD), the better contrast you get on thin lines and detail, and the less obvious jaggies/aliasing you see when panning or zooming slowly over such detail, even after downsampling to a fixed 720 pixels per line.
With 16 bit sampling at 48 kHz, the MiniDV format should be capable of reproducing CD or DAT quality sound. I tried two different signal generators, with and without attenuation right at the mic input. The TRV900 consistently comes in at 0.8% THD+N and 42 dB SNR, which is surprisingly low. It doesn't matter if you use 12 or 16 bit mode. I think the culprit is the microphone amplifier (line in is available only for 2nd track dubbing, or external source video recording). I got the same numbers if I use headphone or A/V as audio out, and at several different record level/input level settings. 60 Hz + harmonics is the dominant noise term, but not by a large amount. Sony doesn't spec audio SNR or THD on this camera. If you want audiophile sound, better use a separate minidisc or DAT recorder. Note, by the way, "dynamic range" is quite different from SNR and is probably a much higher number, but I didn't measure it.
The A/V line input of the TRV900 tests at 43.4 dB SNR. However, the dominant "noise" is 60 Hz and 180 Hz (3rd harmonic), which suggests hum pickup in my cable. If you ignored those two frequencies, the figure would be about 63 dB SNR. I actually tried testing the internal microphone, recording a 1 kHz tone from a speaker. That gave me a reading of 35 dB SNR, but part of the noise was a 15.8 kHz spike, which was no doubt the horizontal retrace from a TV which I had on and nearby.
It's difficult to test these things properly. My SNR measurements are considerably lower than the manufacturer's claims, in every case; perhaps I'm doing something wrong. All I'll claim that you can really infer from this chart is the relative rankings of audio performance, since I used the same test setup to measure each one. It so happens the ranking by SNR agrees with my prejudices about sound quality, in order: Turtle Beach Fiji soundcard, Sharp 702 minidisc recorder, Sony TRV-900 DV camera, Panasonic AG-1980 SVHS deck, Sony WM-D3 Dolby-B recording walkman, and last and least, an inexpensive dictation cassette recorder.
THD % THD+N % SNR dB signal
dB
Remember to take these numbers with a grain of salt. Subjectively the camera comes off very well: several people have emailed saying the camera has great sound and they've made their best-sounding audio recordings to date with it. One Usenet poster did say he found the Sony VX1000 to have better sound, but another user wrote that the TRV900 sound beat out the VX1000 (see the comparisons here.)
I recorded and played back an audio signal referenced to the NIST atomic clock (WWV Ft.Collins, CO) and measured both the '702 and the TRV900 drift to be less than 2 ppm (<0.0002%). That means you'd expect less than one frame of drift in two hours. This is "good enough" because the longest possible MiniDV video (LP mode on the Panasonic AY-DVM80EJ tape) is 2 hours. It might be even better but I didn't measure long enough to find out.
The above numbers show the record vs. playback drift of the same device, which is the relevant number if you are doing linear editing, or resampling analog signals into your computer. If you transfer the signals digitally to your computer (sending video through firewire, and S/PDIF digital audio through a coax from a MD deck to a PC soundcard), the NLE assumes exactly 29.97 fps video and 44.1 kHz audio (for example) so what matters is the actual ratio of the MiniDV and MD master clocks.
I measured my TRV900 as 19.9 ppm fast (gains 1 frame every 28 minutes relative to a perfect clock), GV-D900 as 7.5 ppm slow, and my TR7000 (Digital 8 camera) as 5.3 ppm fast. Relative to my Sony MDS-JB930 MD deck, my TRV900 is 9 ppm fast, my GL1 is 11 ppm slow, and my portable Sharp MD-MS702 recorder is 77 ppm slow. So if I recorded a 1-hour soundtrack with my '702 (86 ppm slower than the TRV900) I would have to make the audio track 8 frames (0.277 seconds) longer in the NLE to match the video from the TRV900. However, you'd be less than one frame off if each individual take is shorter than 7 minutes. (If you're making a movie, you'd probably never have a single take this long, but if you're doing event videography, you probably would.) Watch out for soundcards: my Turtle Beach Fiji, generally a good-quality soundcard, has a sample rate 800 ppm slow at 44.1 kHz, so a soundfile recorded by it would drift one frame every 41 seconds).
Subject: DROP FRAME TIME CODE
Date: Tue, 26 Oct 1999 12:05:44 -0400
From: D Gary Grady (dgary at mindspring com)
The original Electronic Industries Association (EIA) black-and-white television standard developed in the U.S. (and later used throughout North America, western South America, Japan, some Pacific islands, and a few other places) ran 60 fields per second, in keeping with U.S. electrical frequency.
(Line frequency is extremely stable and almost perfectly 60 cycles per second, to the point of being kept in phase synchronization over large parts of the country to facilitate load sharing among electric utilities.)
To keep down bandwidth while maintaining resolution, alternate frames are slightly offset with respect to each other, so that a complete, full-resolution "frame" takes two fields.
When the National Television Standards Committee (NTSC) modified the EIA standard for the purpose of adding color, they reduced the frame rate by exactly 1/1000 to keep the bandwidth within established broadcast standards. Thus NTSC television operates at 59.94 fields per second (0.06 less than 60.00), or 29.97 frames per second (0.03 less than 30.00).
For editing purposes, each frame is assigned a number consisting of an hour (0 and up), a minute (00 to 59), a second (00 to 59), and a frame (00 to 29). The first frame is 00:00:00:00, the next 00:00:00:01, and so on.
The problem, of course, is that there aren't really 30 frames (00 to 29) in a second, but only 29.97. But it's hard to number things that way.
In ten minutes -- or 600 seconds -- the difference adds up to exactly 18 frames. If we can somehow drop 18 frame numbers per 10 minutes, we can keep the time code from drifting too far from wall clock time.
So here's what they do: The first two frame numbers of each MINUTE are dropped. That would take away 20 frame numbers in 10 minutes, so we don't drop them for minutes that end in 0.
That means, for example, that time code 00:00:59:29 is followed by 00:01:00:00, but time code 00:01:59:29 is followed by 00:02:00:02.
Working with manual camera logs and edit decision lists (EDLs), this is a little confusing, so outside of broadcasting (where split-second timing is important), the convention arose of using non-drop-frame time code, simply ignoring the slight difference with wall clock time. As long as you're consistent (all drop-frame or non-drop-frame), and you're not worried about exact timing, it makes no difference. But with nonlinear editors, there's no real advantage for non-drop-frame, so one might as well use drop-frame and keep the timing dead on. The TRV900 uses drop-frame time code.
PAL television runs exactly 25 frames per second and hence has none of this nonsense to deal with. It also has more stable broadcast color and other advantages, among them being much better suited to shooting DV for transfer to film. We NTSC users can only grind our teeth in envy.
If you want to be absolutely sure, you can record over the entire tape first. (To record black, leave the lens cap on, or set the exposure to minimum: iris closed. For no sound, set manual audio with volume at minimum and/or plug in an open or shorted cable to the mic jack). This takes time, but "striping" the tape this way guarantees there will be no timecode gap.
I started with Sony tapes and soon switched to Panasonic due to better price and availability. As of January 2001, I've used about 20 Sony tapes and about 100 Panasonic tapes. Some of them I've re-recorded over several times with no visible problems. Upon initial inspection, one Panasonic tape did not appear entirely uniformly "packed" on the takeup reel, so I did a FF/Rew to repack that tape (standard procedure with the analog tape formats) before recording. This tape worked fine in LP mode. I had a few dropouts on another Panasonic tape I didn't do this with. Interestingly, the dropouts showed only once- I played that spot back again and they were gone. The camera takes 2.5 minutes to fast-forward the whole 60 minute tape, and 2.5 minutes to rewind. In the past year I haven't repacked any tapes, and haven't noticed any adverse effects.
Panasonic also makes an 80-minute MiniDV tape, the AY-DVM80EJ (80 minutes SP, or 120 minutes in LP mode). They later introduced AY-DVM83EB and AY-DVM83XB but I don't know what the difference is. In my first test, I recorded a 2-hour program in LP mode and I didn't see any problems on playback. The actual recorded time was about 123 minutes (2:03:44:17 to be precise :-). I have since recorded several events using the 80-minute tape in LP mode, and each one has had at least one dropout. Some other people have reported dropout problems using this tape, especially in LP mode and when re-recording. Others report no problems.
In late 1998, a post to rec.video.production suggested problems with Panasonic DV tape, and a discussion ensued. To summarize, apparently Panasonic's MiniDV tape lubricant would react unfavorably with Sony's, so mixing tapes caused residue build-up along the tape path, including the $$ heads. According to Panasonic tech support, it was Sony who reformulated their tapes sometime in 1997 to make them compatible with "everyone else", and the problem should not occur with new tape stock.
Meanwhile, MiniDV tape is now also available from TDK, JVC, and Fuji. There have been a few reports of mixing JVC and Sony tapes without ill effect on the TRV900 mailing list. One user has reported (May 1999) that mixing Panasonic and TDK MiniDV tapes resulted in a head clog in his TRV900 (which went away as soon as he switched back to Panasonic). In general, caution is advised- if you have any similar experience, good or bad, to report, I'd be interested to hear of it. Some are suggesting running a head cleaner tape (eg. Panasonic AY-DVMCLA or Sony DVM-12CLD) if you must switch brands, but don't use cleaning tapes regularly since it puts wear on the video head. One person even reports you should use the same brand head cleaner as the tape brand you are switching to. Tape Resources has a useful Tape FAQ including some technical notes from Sony. Recommended reading. The DV Tape FAQ at zenera.com has more information as well.
In November I got a GV-D900 "Video Walkman" which is a small MiniDV VCR. So, now I have two devices which can read and write MiniDV format tapes. Both devices work fine in SP and LP as long as they read the same tape they recorded. Also, SP tapes recorded on one will play fine on the other, but LP tapes will not. "Foreign" LP tapes have a lot of dropouts, and the timecode display is intermittent: it looked like the tape was on the ragged edge of unreadable. So, I think LP is unusable for production if you need interchangability. The manual admits this:
NOTES ON RECORDING MODEThis tells you there will be dropouts, because the SP and LP modes record exactly the same digital information, so the image degradation is due to readback errors. Two users mailed me, saying their D900 was perfectly fine reading his TRV900 DV tapes both in SP and LP mode, so your milage may vary.This VCR plays back and records in SP (standard play) mode and in LP (long play) mode. The VCR automatically plays back the tape in the recorded mode. The playback quality in LP mode, however, will not be as good as that in SP mode. (...)
GV-D900 manual (3-862-371-12 (1) © 1998 Sony), p. 10
Subject: Re: mini dv tapes vs. airport x-ray?
From: Ron Smith (capnronNOcaSPAM@altavista.net.invalid)
Newsgroups: rec.video.desktop
Date: Sun, 10 Oct 1999
Having worked as a passenger screening officer, I have never had an instance where any magnetic medium was damaged by our screening equipment. Both xray and metal detection devices. Film over 1000 asa can be fogged slightly. We always asked that any electric devices be operated simply to assure that they were what they appeared to be. Ie: camcorders, laptops, etc. DON'T pack high value devices in checked luggage. Keep them in your carry on as they are prime targets for rip offs. --Ron
Even if you are going to re-use a MiniDV tape, I don't have any information to indicate that erasing the tape first improves anything. That was true of analog tape formats, where erasing would improve SNR, but digital tapes are different. I have reused several tapes without erasing first, and had no problems. You may want to consider this article by Scott McLain (marketing director for Garner Industries, which makes degaussers) who suggests that the strong eddy currents from high-energy metal tape degaussers can heat the tape enough to damage it. He also claims that bulk-erasing does benefit digital media, but I haven't seen evidence of that in the case of MiniDV.
If you're into hacking your hardware, this page reports that Sony Digital8 cameras can be modified to do real-time direct analog-to-DV conversion by changing a parameter memory setting. For this you need the Sony RM95 LANC service remote or an equivalent software tool. I have not tried it, but I'm told it works on the TRV900 too; see the details here if you're curious.
Almost all commercial videotapes are recorded with a copy protection signal. The Sima SCC or SED-CM copyguard eliminator enables you to make copies on a normal VHS VCR. I have the SCC, which can also do color correction. However it does not eliminate the entire protection signal and the TRV900 will still refuse to record such a signal- even from a VHS copy of the protected video. There are, or were, devices which can enable the TRV900 to copy protected tapes, for example the "Eliminator Copyguard Doctor RX-II" (which as far as I know, is no longer sold anywhere). If you are interested in more details about protection signals, you can visit the Macrovision FAQ.
Depending what use you intend to make of copyrighted material, you may also find relevant the information on copyright law at fairuse.stanford.edu as well as the Cybercollege.com online production text, module 67: Legal and Ethical Issues under "Copyrighted Materials". In the United States, copyright law is set forth in Title 17 of the US Code. The Digital Millennium Copyright Act of 1998 may also be relevant. Law is a complex subject, and subject to precedent and interpretation. For legal advice, please consult an attorney.
Note that the camera does NOT use a "letterbox" format on the video out to give you a 16:9 image on a regular TV... it just stretches things so that you get a true 16:9 full-screen image IF you have a 16:9 widescreen TV, and a stretched-looking 4:3 full-screen image on a regular TV.
Since the TRV900 does not have an internal anamorphic lens or true 16:9 CCDs, using 16:9 mode will throw away some vertical resolution. So, it would be better to use a "true" 16:9 camera for wide-screen production, but the cheapest such camera is the JVC GY-DV700 which is approximately $10,000. Century Optics recently (March 15 1999) released a 16:9 anamorphic lens for the TRV900 and similar cameras. It is not cheap. There is another anamorphic lens sold by OpTex in the UK, which some claim is better than the Century one. Victor K. has shot a widescreen feature with the TRV900 and Century Optics anamorphic lens, and commented that the lens was soft at the longer zoom settings, restricting his framing options. If you're thinking about shooting widescreen, you should visit Ben Syverson's page.
Note that the auto-focus works more slowly with slower shutter
speeds; if you want auto-focus this might be the biggest problem.
Autofocus works at about 1/2 the speed when you go from 1/60 to
1/30 shutter.
If you take the tape out of the camera, it will not shut off, but it will assume it is in a video store and must sell itself to customers, so it enters a "demo" mode after about 10 minutes: see TRV900 manual p.31 (NTSC) or p.40-41 (PAL). You can avoid this by turning off the demo mode in one of two ways. Method #1: with no tape loaded, press the menu botton, select the 6th menu type (toolbox icon: "SETUP") which has as its last sub-menu option "DEMO MODE". Select this and turn it to OFF. (Note: the OFF setting will not be selectable if there is a tape in the camera.) This change persists when you turn the camera off; you won't see demo mode again unless and until you change this menu setting back.
Method #2: with no tape loaded, hold down the STOP button on the top of the camera at the same time that you turn the camera on. The screen will display DEMO OFF briefly. STOP is one of the VCR-control buttons which are flat membrane keys along the top of the camera, and not illuminated (nearly invisible) unless the camera is in VCR playback mode. So, start in VCR mode, hold the stop button down, then switch the mode selector through OFF to CAMERA. This demo-removal method is temporary and resets once you turn the camera off.
Method #3: If you insist on leaving the tape in the camera and still don't want it to shut off, there's a way to do it. The LANC connector is a 3/32" stereo miniplug, which has the usual three connections, named from the end: tip (LANC data), ring (+5..+8 Vdc), and sleeve (GND). After the camera does auto-shutoff, it leaves about 2.8 V on the tip relative to the sleeve. The signal to turn the camera on is shorting the tip to the sleeve momentarily, and you could make up a one-button LANC remote to do this if you wanted. Radio Shack has the parts, eg. a 1/8" stereo plug (RS #274-284) and 3/32" to 1/8" stereo adaptor (RS #274-373), plus whatever switch you want.
Or, you could leave the tip and sleeve shorted indefinitely, but please think carefully if you really want to do this. The auto-shutoff serves a purpose: preventing the spinning head from wearing a hole in the tape, and the head from excessive wear/contamination during this process. If your camera is damaged from doing this I think Sony would be quite justified in declining to fix it. Enough said.
I have used the slow-motion mode to great effect when producing a "bloopers" tape of a collision during a dance performance, and also a nice sequence of steam curling gracefully from a teapot. You can playback tapes from other cameras, or video recorded from VCRs etc. in slow motion also.
The camera has a "LANC" editor control jack, and should work with any LANC/Control-L editor (which might be cheaper than a firewire NLE system, especially if you already have one). The LANC signal carries the timecode as well. See below, "What is LANC anyway?".
When the camera is in VTR (playback mode), press the "data code" button on the remote or on the camera by the fold-out LCD screen, which cycles through time/date, exposure info, and no display in the lower left-hand corner of the screen. If the time display is --:--:-- either you haven't set the camera's clock, or you're looking at edited video recorded from a computer, which has no time/date data set. When playing back stills from the memory device, you can get time/date only (no exposure info). The info can be made visible on the analog video output as well (see previous "timecode" question above).
Timecode, time/date and exposure information is written as a data subcode for each frame on the digital video (firewire) signal, so that you can turn it on or off during playback. However, it cannot be "burned in" or made visible on the video part of the digital firewire signal, at least from the camera. In theory, your NLE program should be able to read this data subcode and overlay time/date, exposure, and/or timecode on the video. In practice most NLE programs throw away all this information! Write to your software vendor and ask for this feature.
Zebra bars are considered a "professional" camera feature. Manual exposure takes experience and constant attention to do well, and any adjustment you make while the camera is rolling will show up as a sudden change in brightness on playback. If you are an amateur camera user, feel free to leave the camera on auto-exposure and let it do the work.
Like (all?) other current Sony camcorders, the TRV900 is equipped with a 3/32" stereo jack for LANC control. Physically the format is 9600 baud serial, one-line bidirectional (open collector); eight bytes per video frame. You can read more on Manfred Boehmel's LANC page, Kyler Laird's Sony protocols and David Meed's page.
The TRV900, like most other LANC camcorders and VCRs, is a "slave" mode device only. You use them with a stand-alone editing controller box like the Videonics AB-1 or the Canon ED-100. Profeel also has a $240 "Video toolkit" to do control-L editing from your PC. Sony makes the $65 RM-95 wired remote controller, described here but it's just a remote control, not an editor. Prices are approximate. 5/1/99.
2) DC power jack from AC power adaptor. (small, flat, nonstandard)
3) PCMCIA (PC Card) Type II socket, identical to the card slot on a standard laptop computer. It can take a flash memory card directly, or compact flash or Sony memory stick with respective adaptor. A 3.5" IBM-PC floppy disk drive with PC Card adaptor comes standard with the camera (in the USA).
6) audio/video jack (nonstandard miniplug, carries both analog video & audio L+R channels). The provided adaptor cable gives you the familiar three RCA plugs for your VCR. This terminal is also an input or output, depending on the camera mode.
7) headphone jack, stereo miniplug for monitoring record & playback audio
8) LANC terminal "stereo mini-miniplug"
9) DV IN/OUT small 4-connector terminal. Cable not provided.
10) external mic jack, stereo miniplug
I connected the camera via a regular RCA-connector composite video cable to one input of my VCR, and the "LaserLink" reciever to the other input. I played back several sharply focused progressive-mode stills from a PCMCIA card in the camera and did an A/B comparison on my TV. At first I could tell no difference at all; after very critical examination I found the hardwire cable connection to be slightly better in contrast and sharpness. The difference is very slight, though. If you hold the camera closer than 1 foot from the IR receiver you get a noisier signal. Sony claims 16' of range and I found this to be true. At 20' you have to aim very carefully, and you see a little noise in the picture. So, the IR link is useful to save wear and tear on the mini-plug AV convertor for casual playback. For editing, of course, you'll probably use the S-Video plug or the IEEE-1394 connector.
[03/04/01] The current laserlink receiver model is the IFT-R20 which advertises a usable range of 26 feet, instead of 16 feet. It is also less expensive (MSRP $50).
In my experience the lithium batteries are worry-free, IF you use them regularly. However, I have found if you fully charge an infolithium battery and store it for several months, it will loose significant capacity. This is apparently due to a passivation layer effect which is reversable, by discharging the battery at the normal use rate: see this article.
[03/12/02] Several people have reported that they have "killed" their Sony infolithium batteries by leaving the battery on the camera while it was plugged in to the wall over a period of months (eg. in desktop editing use). I recommend removing the battery before extended use of the camera on AC line power.
INFO DURING PLAYBACK: The camera records time, date, and camera settings (exposure etc.) on a data track separate from the video. When playing your video back, you can view onscreen the (a) time and date recorded, (b) camera settings at that time, or (c) none of the above. This is very useful for seeing the effect of various settings on image quality. There is a search mode which can auto-rewind the tape to, for instance, the video you recorded yesterday. You can also view timecode (hour:minute:second:frame).
RECORD REVIEW: Some cameras have a "CAMERA" mode which only records, and a "VTR" mode which only plays back. The TRV900 is more flexible: without leaving the CAMERA mode, you can use the two "Edit Search" buttons (on top next to the "Fade" button) to quickly review what you've just recorded in the viewfinder. They actually just play the tape back (or forward) at normal speed. Recording will resume wherever you leave the tape, so you can use it to record over a bad take.
SLOW MOTION: There is a 1/3 normal speed slow motion playback feature which is completely smooth (for normal video.. progressive-scan will be jerky). This gives you a professional-quality slow-motion effect. (That's a feature I had hoped for on my Panasonic AG-1980 SVHS deck, but didn't get.)
TIME LAPSE: "Interval recording" allows you to do time-lapse recording, of a sort. You can set the "record time" to 0.5, 1, 1.5, or 2 seconds, and the "delay time" between recordings to 30 s, 1m, 5m, or 10m. You cannot record a single frame at a time, which is perhaps a limitation of the tape transport stop/start accuracy. (To my knowlege no consumer camera offers single-frame video recording.) The closest to that on the TRV900 is three frames at a time (see "FRAME RECORD"). If you have a computer editing setup (NLE) you can of course create single-frame sequences in post-production. If you are planning a time-lapse sequence, this document from Carroll Lam can help you determine the appropriate settings.
FRAME RECORD: You can set a mode called "Frame Record" which actually records three frames on the tape each time you press the record button. It's not quite what you'd want for single-frame animation but you can use this to put together a kaleidoscopic rush of images for effect.
SPEAKER: There is a small speaker so you can monitor audio playback. When you get it, the camera has the sound-effects mode on: almost every function button is accompanied by some interesting sound. Fun, but after an hour this wore thin and I turned it off.
END SEARCH: The button at lower-right under the fold-out LCD screen labelled "end search" will move the MiniDV tape to the end of what's been recorded so far, so you can record new material smoothly. This feature works with MiniDV cassettes having the IC chip. It also works with tapes without a chip, until you first remove them from the camera. End search is useful because if you start recording at some point after your last shot, leaving an unrecorded gap on the tape, your timecode will reset and the new segment's timecode will start over from zero.
EFFECTS: The camera has some digital image and video effects, which may be useful if you're doing a rock video. The "negative image" and "luma-key" modes are sort of interesting, but for high-quality effects you'll need to look elsewhere. It does not have the "PASTEL" effect available on Sony Hi8 and D8 cameras. There is an in-camera title function which looks just as crude as one in any cheap camera, and works only for DV cassettes with the memory chip. I'd say the use, if any, is more for indexing and searching. For good quality titles you'll want a computer or video titler.
COLOR BARS: In CAMERA mode, the last item on the ETC menu is "COLOR BAR". Select this option and turn it on, you will see full-screen color bars (8 bars across the screen) that can be recorded to tape and/or used to adjust a monitor in real time. Note that the audio track is still from the internal or an external mic; there is no provision to generate a pilot tone internally. Note that these are not SMPTE color bars, as they lack the reverse bars and the "PLUNGE" area.
BATTERY: Like other new Sony cameras, it uses the "info lithium" battery. The battery pack itself contains a microprocessor, and the camera has a display that reads out remaining minutes of battery life. This is approximate, and can go up or down suddenly if, for instance, you switch from viewfinder to the fold-out LCD display (which uses more power). It's a handy feature and it seems to be reasonably accurate. These batteries are not supposed to suffer from the NiCd "memory effect", so you can recharge them any time, and not necessarily all the way each time, without harm. In practice I have found this to be nearly true- there is a very slight memory effect (for each shallow discharge/charge cycle, you loose a few minutes of indicated capacity)- but a full discharge/recharge cycle restores it completely.
The camera comes with the NP-F330 battery (75 minutes continuous record time). I got a $100 NP-F750 pack claiming 315 minutes cont. record time. This seems about right. Note that in normal practice you seldom "continuously record": you're still using battery power in the "pause" mode. Sony lists typical record time of 40m for the F330 and 140m for the F750. This also seems about right.
STEADY SHOT: The "super steady-shot" mode does work, and on full wide-angle, handheld shots can look almost motionless (the camera has two motion sensors to detect and compensate for hand trembles). However for the very best video quality, I'd still suggest a tripod. The TRV900 uses 2-axis optical stabilization. The Sony Digital 8 cameras, by contrast, use a digital method (shifting the active pixel window on the CCD) for stabilization.
FOLD-OUT DISPLAY: You can rotate the LCD display screen 180 degrees to face forward to see your self-portrait while recording, or fold it back against the camera for a mini-TV look during playback. If you do that, you can prop the camera up with the small wire bail on the bottom, for a better viewing angle. When the screen is rotated 180 degrees in camera mode, the viewfinder is also active, so you can shoot and show your subject the camera view at the same time.
EXTENDING VIEWFINDER: The larger batteries, such as the NP-F950, protrude from the rear of the camera, so you can't hold the viewfinder against your eye. However, you can pull back on the viewfinder and it will slide back about an inch, clearing the battery. The same is true of some other Sony cameras, by the way.
DV IN/OUT: The camera can playback and record video through the DV terminal. It can also do assemble editing (see below). To do non-linear editing (NLE) on your computer you need a IEEE-1394 (aka Apple's FireWire, Sony's i.LINK) interface card. I got an email which said: "I use it with DPS Spark-it works fine if you have a lot of computer and some knowledge of same. It is fully compatable with the Spark and Adaptec codec." Another user wrote that he was happy using the TRV900 with a Truevision Bravado DV2000 on his PII-450 running Win98. I had the DV2000 and I find editing is very slow on my P200/MMX. Later I got the Canopus DV-Raptor and a PIII/500 and editing is much better. For more details see my NLE editing page.
DV EDIT: In VCR mode, the last item on the ETC menu is DV EDITING. The TRV900 can act as a firewire controller and do single-segment assemble editing if you have another firewire device. For instance, another MinDV camera, a Digital-8 camera, or a MiniDV walkman. I have tried this with the TR7000 (Digital 8) camera and it works fine. In this mode the TRV900 is always the source deck and the other camera/VCR is the recording deck. The audio/video signal transfer as well as the control takes place over the firewire cable.
Another possibility is that the tape is fine, but the computer dropped some information during the firewire transfer due to a slow disk, inadequate buffer size, long interrupt latency, or conflicting hardware or software of some kind. However most capture programs will warn you of "dropped frames" at capture time, if so. If you capture the segment again and the beeps are in the same place, odds are it's a problem on the tape.
From: "GB" (plantek at xspambigpond com)
Newsgroups: rec.video
Subject: Re: TRV900 won't playback?
Date: Wed, 16 Feb 2000 12:55:22 +1100

Mike Claytor (claytor at psy utexas edu)
> I have a TRV900 which has suddenly stopped being able to playback tapes.
> I get a bluescreen on the LCD as well as in the viewfinder.
> In record mode, the screen is fine and I get an image.

I have had similar 'blue screen' problems when switching into 'camera'
mode...  No message, no picture - nothing....  Switching on and off a
couple of times has fixed it (for now).  GB
It would be good if the camera had a auto-exposure "spotlight" mode, like my old Canon ES2500. Or equivalently, have a brightness adjust (exposure shift) function with more range (the camera has this function, but it has a very limited range). Or if you could just limit what the auto-exposure mode can push the electronic gain to (i.e., something less than +18 dB). I think the Sony VX-1000 has better exposure control (it is a more expensive camera too).
Menu button placement Several people have mentioned they wish the "menu" button was on the outside of the camera, and I have to agree. If you are shooting with the viewfinder, you have to open the LCD screen to access the menu button. (After that, menu selections can be carried out with the combo wheel/pushbutton which is on the outside.) Most of the things you really need to change on-the-fly are done through external controls, though.
Zoom range is only 12x I wish the optical zoom range was longer. (12x optical, 48x digital). Up to about 20x zoom the resolution is ok if you're going to a VHS tape- beyond that there isn't much point, except possibly for critical focusing purposes. I bought a 2x telephoto extender and it works fine, although with it, the 1/4 of the zoom range on the wide end is vignetted by the external lens housing. By the way, this is mostly for wildlife work: for "normal" video work, long zooms are less useful than you might think, plus you really need a good tripod to use them effectively.
Second-channel audio playback It would be nice to hear 1st channel audio playback when dubbing the 2nd channel. I've heard some JVC MiniDV cameras can do this.
Single frame advance You can use the IR remote to view your video at several speeds including still-frame mode, which actually shows you every other field. You can step through each (even?) field, with the odd scanlines being interpolated(?). It would be nice to be able to see the odd fields too. When viewing video recorded in progressive scan mode, you see the full frame, but have to hit the step button twice to get to the next image. This is a consequence of the 15 fps frame rate: each frame has two copies on the tape.
Info-lithium reliability This is a second-hand annoyance: one person wrote to tell me his info-lithium battery went "crazy" after 10 months (it would report, alternately, no life left or 40+ hours). Sony only gives you a 90 day warranty on the battery. The TRV900 will only use info-lithium batteries and refuse to work with any other type. I have had no trouble with the Sony NP-F750 battery I've used for two years now. There is a second source for them, AC Delco brand info-lithium are now sold by B&H Photo and are (I'm told) cheaper and higher-capacity than the Sony ones. I had one email saying the AC Delco type accumulates a memory effect, and one email saying they were fine. See also lithium battery tech details.
From: M Weiss (mweiss javanet com)
Date: Feb.23 2001 So far so good here. I have the 330 and the 750
that I bought later. Bought them both early in December. One thing
I find is that the "brain" inside this battery can get confused if
you don't take it off charge as soon as "full" is reached. The
result is it shows a lower than true remaining time. Completely
discharging and recharging seems to fix that.
Sound quality The sound quality isn't as good as the DV format is capable of, although relatively speaking, it's not bad. There is microphone input but no line-level input to use live from a mixing console (it has line-level input but it is active only in VCR mode, ie, with external video input). Sony does sell a pro version of this camera, the DSR-PD100, with an adaptor for (mono) XLR input and a DVCAM tape format listing for $3000, but otherwise it is mostly the same camera. You can also get an external XLR adaptor box for the TRV900 for use with pro mics and/or mixers, see my accessories page.
Microphone placement I find it natural to support the camera with my left hand under the lens cylinder, but if you do this you cover the microphones. For a two handed grip you need to have your left hand under the camera body. It can be tricky to adjust focus without your hand being in the "field of view" of the microphones (not the lens) which shifts the stereo imaging of the recorded sound. The optional microphones (normal or shotgun) which mount above the lens on the intelligent accessory shoe would fix this, I assume.
Prog. resolution in slow-shutter mode The resolution of progressive scan mode at 1/60 sec. exposure is very good, but I am not so impressed with the resolution at slow shutter speeds. At anything slower than 1/60 sec, I don't see any difference in resolution between progressive and interlaced scans- if you need a slow shutter, you might as well use interlaced scan mode and get the better light sensitivity.
Resolution in red Regular NTSC video has always had trouble with deep reds, but this issue shows up even on digital stills, as shown here. I confirmed this by comparing digital stills on the computer, taken using external red, green, and blue dichroic filters. My attempt to quantify this is shown here.
Flicker in rough conditions The servomechanism controlling the iris is not perfectly stiff, so if you bump the camera it will shudder briefly, causing a visible flicker in the image if you have it set to a small aperture (eg f/11). I have never seen this on my camera but it may be an issue if you take your TRV900 mountain biking, skiing, or skydiving. This issue reported by Kyle (k2dive@ibm.net), who says Sony replaced his lens assembly and it is better now. Some people on the rec.skydiving newsgroup say they have no trouble with their TRV900s. I'd imagine you could reduce the problem by using enough external ND filter to open up the iris to f/8 or f/5.6, so small movements of the iris blades aren't as large a proportion of the total aperture.
LCD Screen Pixels On p.5 of the TRV900 (NTSC) manual it states: "...there may be some tiny black points and/or bright points (red, blue, or green in color) that constantly appear on the LCD screen and/or in the viewfinder. These points are normal in the manufacturing process and do not affect the recorded picture in any way. Over 99.99% are operational for effective use." My TRV900 LCD screen has one dead blue pixel, such that the blank "blue screen" display shows one tiny black spot. This dead LCD pixel isn't recorded on the tape, it doesn't prevent me from using the camera effectively, and normally I don't even notice it. I am mentioning this because I think it is quite likely many TRV900 cameras have such LCD pixel flaws, and if you are bothered by this type of defect, you may ending up returning several cameras before you find a perfect one.
Operating when cold When operating with heavy gloves, it is difficult to press the "photo" button without also hitting the zoom rocker. On the plus side, the camera does work fine at -10 C (which is more than I can say for the operator!)
Firewire problems: The computer has a small 4-pin Firewire port, also called "i-Link" (a Sony trademark) and IEEE-1394. This port can send audio and video data in digital format ("DV") out from the camera and back into it: for example between the camera and a computer, or between two DV cameras. Two problems can occur with this connection: one is that the small firewire connector has a poor mechanical design and it is possible to force the firewire cable into it upside-down. Doing this even once can damage the camera connector permanently, requiring factory repair, so be careful. Several people have reported doing this to their camera. Second, several people have reported electrical damage to the firewire drive chip inside the camera, either from a miswired firewire cable, an electrical surge from a nearby lightning strike (!), or some other, as yet unknown cause. I recommend disconnecting the firewire cable when it is not in use, and when you do plug in, please confirm the connector is oriented properly.
Tape Crinkles: Many people (out of a 450+ member TRV900 mailing list) have reported tape crinkling, which is usually due to residue build-up on the tape capstan, and more rarely from a misaligned or mis-tensioned tape transport. After a year of use, my own camera developed this problem as well. If you keep your capstan clean, as described on this page you will probably avoid this. Cleaning the capstan tape path is not difficult; you can do it yourself, or have it done professionally by Sony or other camcorder service outlets.
Microphone imbalance or low level: On some cameras you may notice either the left or right audio channel is noticibly more faint after a period of time. It seems the internal microphones can sometimes loose sensitivity, and the only fix is to have the mics replaced by Sony. I have heard of about fifteen such cases from my email. The problem may be caused by moisture (high humidity, or rain/water spray) affecting the electret mic elements. Some cameras have more "hiss" type noise than others, which may be related to the same problem. One user reported both hiss and level imbalance, and factory service to replace the internal mic elements fixed both problems at once.
Eject Switch Malfunction: I have had four reports that the small slide switch which ejects the tape has stopped working, requiring factory repair. This switch has a flimsy feel to me and I advise you to be careful with it. In some cases the switch mechanism is jammed by dirt or debris, and one user fixed it himself as described here. My own eject switch failed in March '00, and I followed those instructions and fixed it myself. Warning- opening camera not for faint of heart.
CCD Dead or Hot Pixels: Not to be confused with the LCD (display screen or viewfinder), the CCD chips record the image from the lens, and problems here will be recorded on tape. A "dead" pixel is dark all the time, and a "hot" pixel shows as a bright spot, especially at high gain and slow shutter speeds (and high temperatures). It is normal for a few hot pixels to show dimly at +18 dB gain and 1/4 sec shutter, but if you see them at normal 1/60 shutter, Sony will replace the CCDs if the camera is under warranty. I think it is rare for a CCD to develop pixel problems that were not originally present, but it is possible.
InfoLithium Battery Aging: Sony's rechargable lithium-ion batteries are the best available for camcorders, and a dramatic improvement over the earlier NiCd based products. There is no significant "memory" problem, and the NP-F960 can run the TRV900 for eight hours, a previously unheard-of figure. When stored, the battery looses about 10% of its charge per month. No rechargable lasts forever; you should expect from 500 - 1000 charge cycles or 3 years, whichever comes first (though my NP-F750 still gives me 300 minutes runtime at 3.5 years). Li-ion batteries "age" even without use. You can minimize this by storing batteries half-charged (not full, but not empty) in a cool place (15 C). There is no problem charging the battery overnight, but do not leave the battery on the camera for weeks or months while it is plugged in to the wall. You can read more about lithium batteries here.
Overall Mechanical Reliability: Overall I think the camera is quite reliable. In the first year I owned it, I had no trouble. Several people on the TRV900 mailing list reported heavy use for over a year with no service, no cleaning and no trouble. After the first year I experienced tape crinkle and eject switch malfunction as described above, and if you don't clean your capstan, I suspect you will probably see tape crinkle eventually. Both these problems can be fixed or avoided by cleaning you can do yourself.
Beale Corner Video Forum            Forum for TRV900 and other Video Topics
www.bealecorner.com/trv900          My TRV900 information page
www.zenera.com/reference            Useful DV-related information
www.lensadapter.com/                Microscope/telescope adaptor
www.global-dvc.org                  DV forum (in Europe)
www.adamwilt.com/DV.html            DV tape format, tech details
www.cybercollege.com                professional video production
| TRV900 Main Page. | Entire Site Search |